How to Upload SVG Files to Cricut Design Space
This post and its photos may contain affiliate links. As an Amazon associate I earn from qualifying purchases. If you make a purchase through these links, I may receive a small commission at no extra cost to you.
This tutorial and the photos within it may contain Amazon or other affiliate links. If you purchase something through the link, I may receive a small commission at no extra charge to you.
Learn how to upload SVG files to Cricut Design Space with this step-by-step tutorial.
If you just purchased your very first Cricut you might be wondering how to upload SVG files so you can start making awesome projects with your new favorite crafting tool. Don’t be intimidated! It’s super easy to upload all those free and inexpensive SVG cut files that you see online. And, guess what? Today’s tutorial is going to show you exactly how to do it in 5 easy steps.
What is an SVG Cut File?
SVG stands for Scalable Vector Graphic. You might also see them referred to as cut files or SVG cut files. This is because they are the most compatible files to use with Cricut Design Space. In the DIY and crafting world, SVGs are used to cut paper, vinyl, and other material with the Cricut Explore Air 2, Cricut Maker, and Cricut Joy.
SVG files are the preferred files to use with Cricut machines for a few different reasons. Not only do SVG Files create precise cuts, they can be resized without changing the resolution of the image. This means that one cut file can be used to create both large and small projects. And, though it is possible to upload JPG files to Cricut Design Space, the lines in the image might not be as sharp and smooth as an SVG. Trust me on that – I’ve learned the hard way.
How to Upload an SVG to Cricut Design Space
Step 1: First, save the SVG file that you want to use for your project to your computer. If it’s a ZIP file, make sure you extract all files so you can easily find and upload the SVG you want to use. You won’t be able to select a ZIP file to add to Cricut Design Space.
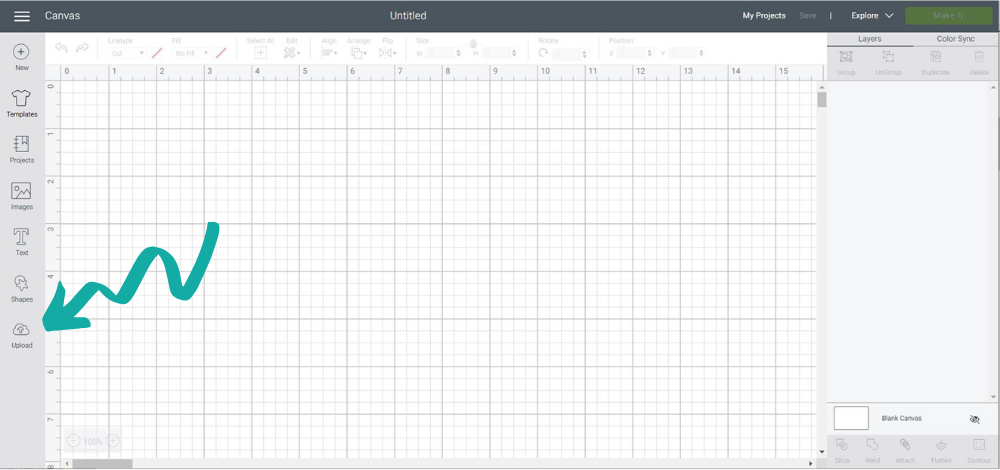
Step 2: Open Cricut Design Space and click NEW PROJECT. Next, click UPLOAD.
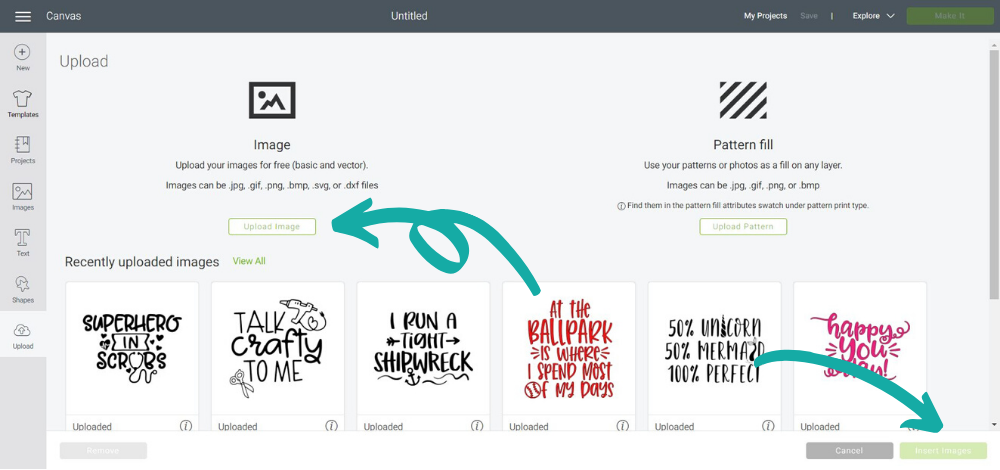
Step 3: Click UPLOAD IMAGE.
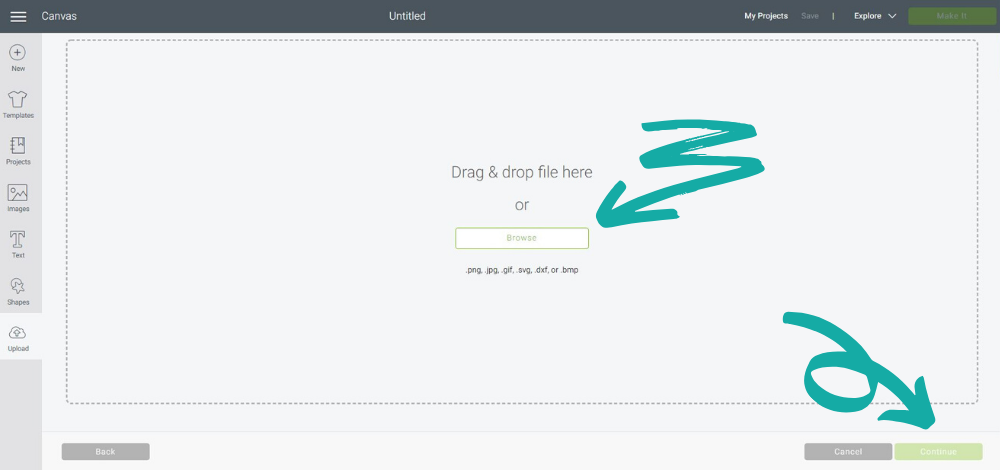
Step 4: Click BROWSE to select the SVG that you want to upload. Click CONTINUE.
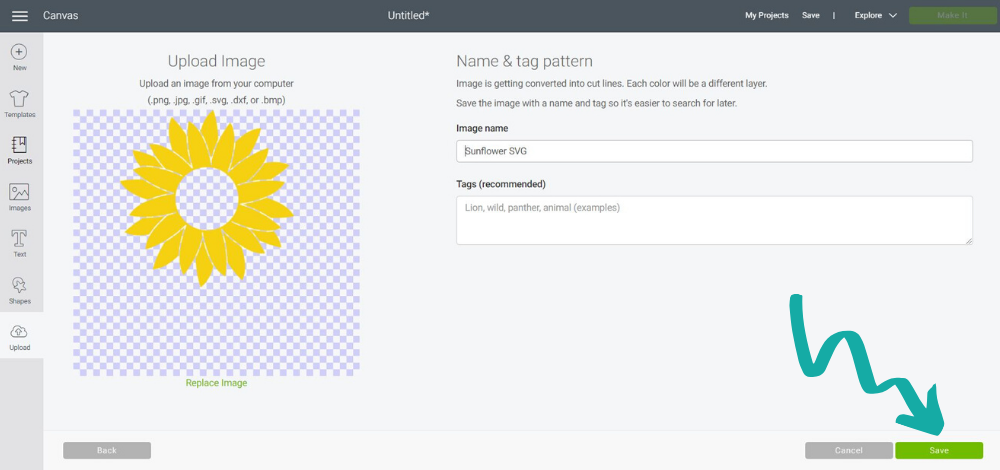
Step 5: This is where you will see the SVG image that you want to upload. Name the file and add tags. Click SAVE.
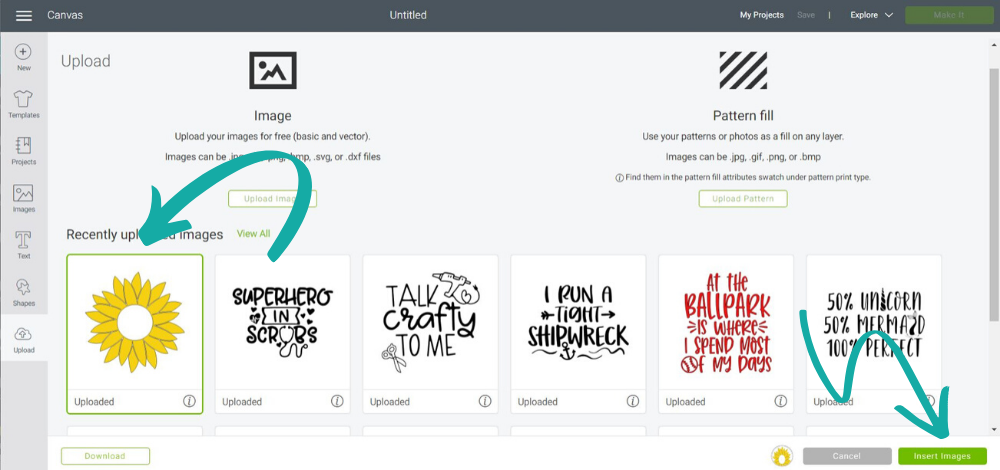
Step 6: Select the image you just added and click INSERT IMAGE.
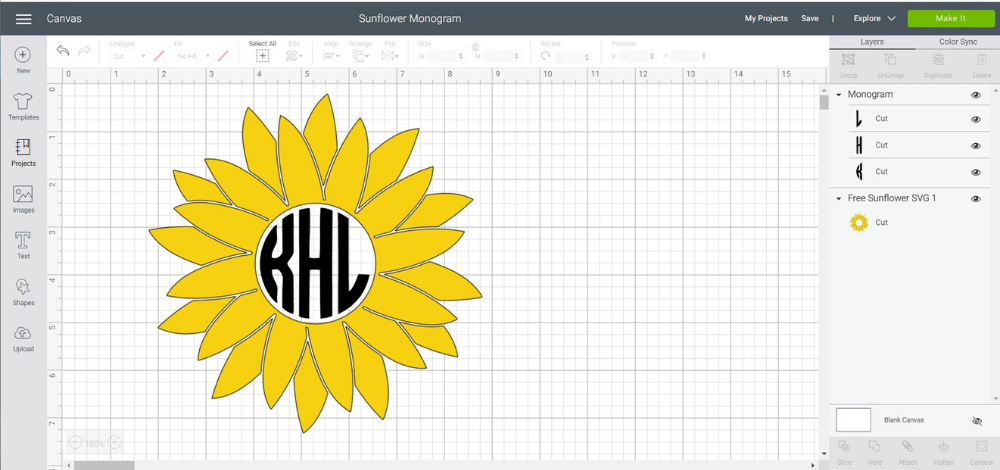
Step 7: Now, you should see your image on the canvas. After your adjust the size of the image, you’re ready to click MAKE IT. I’m sharing the free sunflower monogram SVG with this tutorial so I repeated the steps to add my monogram.
To download the sunflower SVG I used in this tutorial, just add your name and email in the form below and it will be delivered right to your inbox. Then, open your email and save the SVG file to your computer. It’s that easy! I created the monogram SVG using this free monogram maker website.
Where to find Awesome SVG Cut Files
Now that you know how to upload SVG files, where is the best place to find SVG files? Lucky for you I have a fabulous collection of FREE SVG files that you can find below And, I’m constantly adding more so check back often.
[ess_grid alias=”Free SVG CUt Files”]
You can also find free and inexpensive SVG files on the following websites. I’ll warn you now – you will spend hours looking through all these awesome SVG cut files, so grab a cup of coffee or some wine and enjoy!
- 100 Directions
- Albion Gould
- Artsy Fartsy Mama
- Brooklyn Berry Designs
- Burton Avenue
- Caluya Design
- Craftables
- Craft Bundles
- Crafting in the Rain
- Design Bundle
- Etsy
- Everyday Party
- Free Pretty Things For You
- Happiness is Homemade
- Heather Handmade
- Hello Creative Family
- Hey, Let’s Make Stuff
- I Should Be Mopping the Floor
- Kara Creates
- Kelly Leigh Creates
- Leap of Faith Crafting
- Lemon Thistle
- Life Sew Savory
- Liz on Call
- Lori Whitlock
- LOVE SVG
- Mad in Crafts
- Miss Kate Cuttables
- My Designs in the Chaos
- Pattern Revolution
- Persia Lou
- Pineapple Paper Co.
- Polka Dot Chair
- Practically Functional
- Printable Crush
- Printable Cuttable Creatables
- Scarlet Rose Designs
- See Lindsay
- Sew Simple Home
- Sew What Alicia
- So Fontsy
- Special Heart Studio
- SVG & Me
- Sweet Red Poppy
- That’s What Che Said
- The Craft Patch
- The Country Chic Cottage
- The Girl Creative
- The Hungry JPEG
- The Kingston Home
- The Scrap Shoppe
- This is Tisa
- Totally Jaime
- Tried and True Creative
- Unoriginal Mom
- We Can Make That
Wow! That’s an awesome resource right there – so many fun and free SVG cut files to use with your Cricut. Now it’s time to get your craft on. If you love sharing SVG files on your website, leave a link below and I’ll add it to the list.
Happy crafting my friends!!
For more free svg cut file i was found this website https://vectorency.com/freebies/
For more free svg cut file i was found this website : https://www.etsy.com/listing/871314116/pikachu-svg-circuit-png-cricut
I would highly recommend this free online Monogram Maker – https://www.makemonogram.com/ , they have over 80 monogram fonts and tons of frames too!