Easter Bunny String Art
This post and its photos may contain affiliate links. As an Amazon associate I earn from qualifying purchases. If you make a purchase through these links, I may receive a small commission at no extra cost to you.
Make this adorable Easter Bunny String Art in no time with this easy tutorial. A fun way to add a little Easter Decor to your home.
Have you made string art before? I’ve been wanting to try it for a few years and was a little nervous for some reason. But, I decided to give it a try and now I can officially check it off my crafting bucket list.
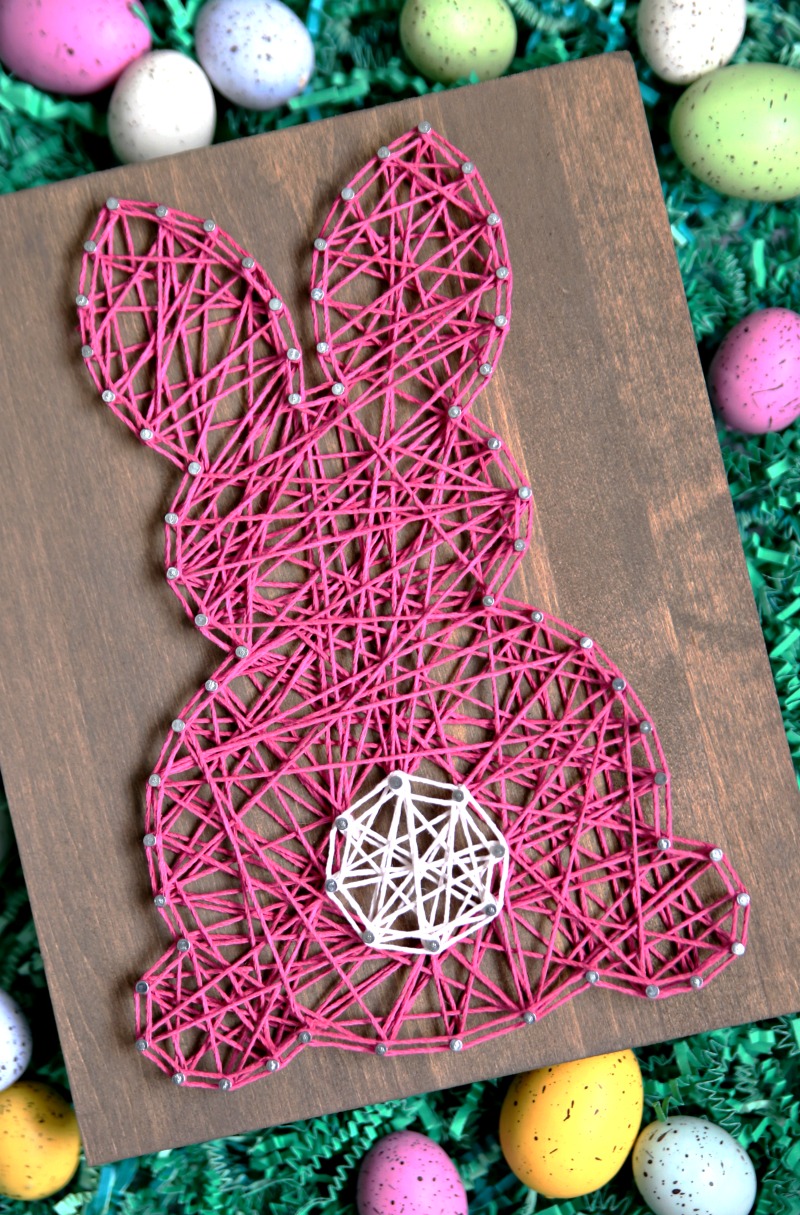
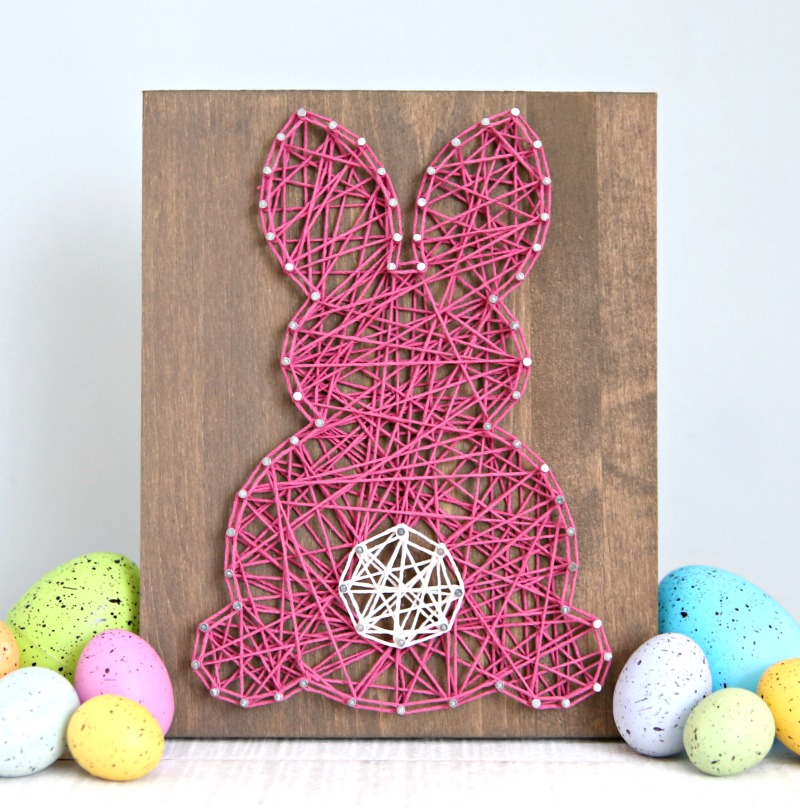
And, look at this adorable Easter Bunny String! Isn’t it fabulous? It turned out better than I thought it would and it was so much easier than I thought. The best part is it took less than two hours. The hardest part was waiting for the stain to dry because I was ready to start hammering.
Want to make your own Bunny String Art for Easter?
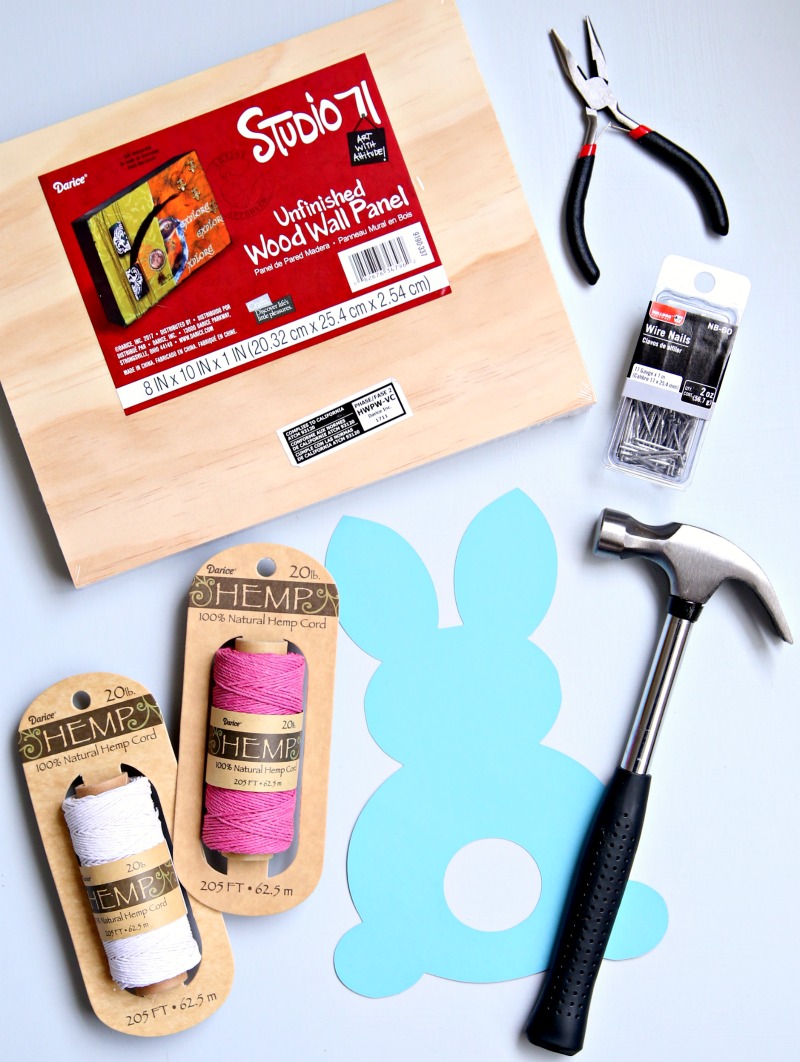
Supplies needed to make Easter Bunny String Art:
- Unfinished Wood Panel
- Paint or wood stain
- Hammer
- 1 inch finishing nails
- Long Nose Pliers
- Hemp Cord
- Scissors
- Double Sided Tape
- Bunny Template
First, paint or stain the board. I was going to paint my board a light pink but then I decided to stain it and I’m so glad I did. I love how it makes the dark pink string pop.
While the stain dries, print out the bunny template and cut out the bunny along with the bunny’s tail.
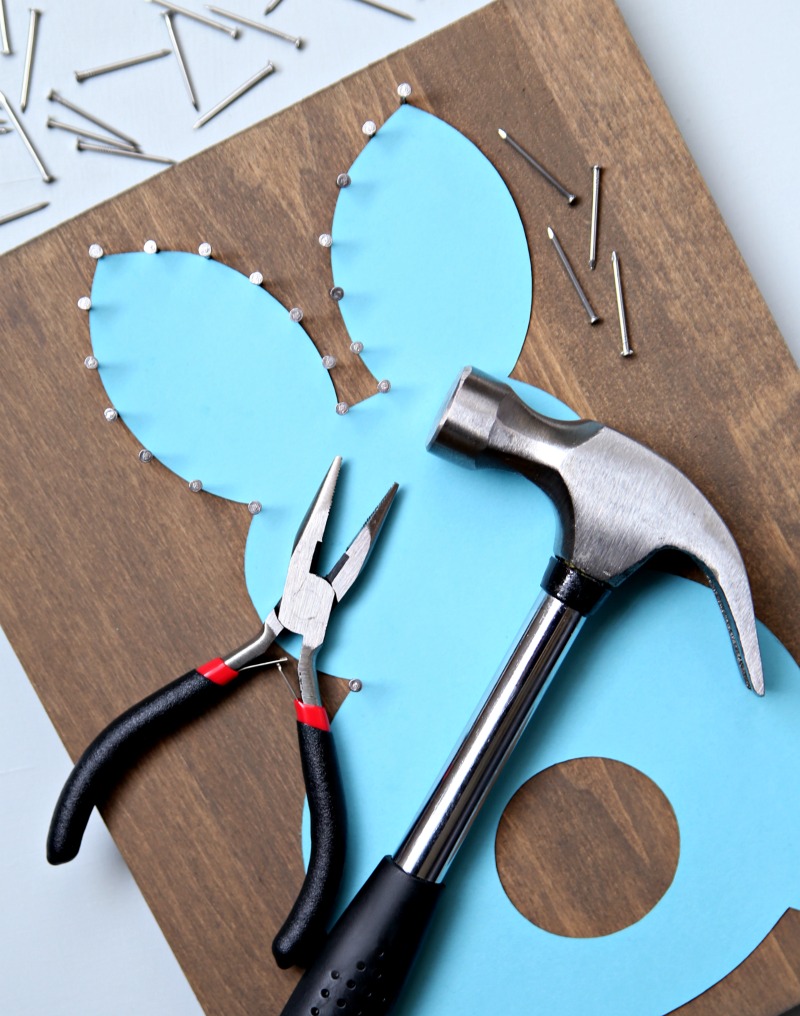
Once the paint or stain is dry, adhere the bunny to the board and start hammering in the nails. I started by placing a nail at every corner. The needle nose pliers help to hold the nail so you can see better. Then, evenly space out the nails around the entire bunny. My nails are about half an inch apart.
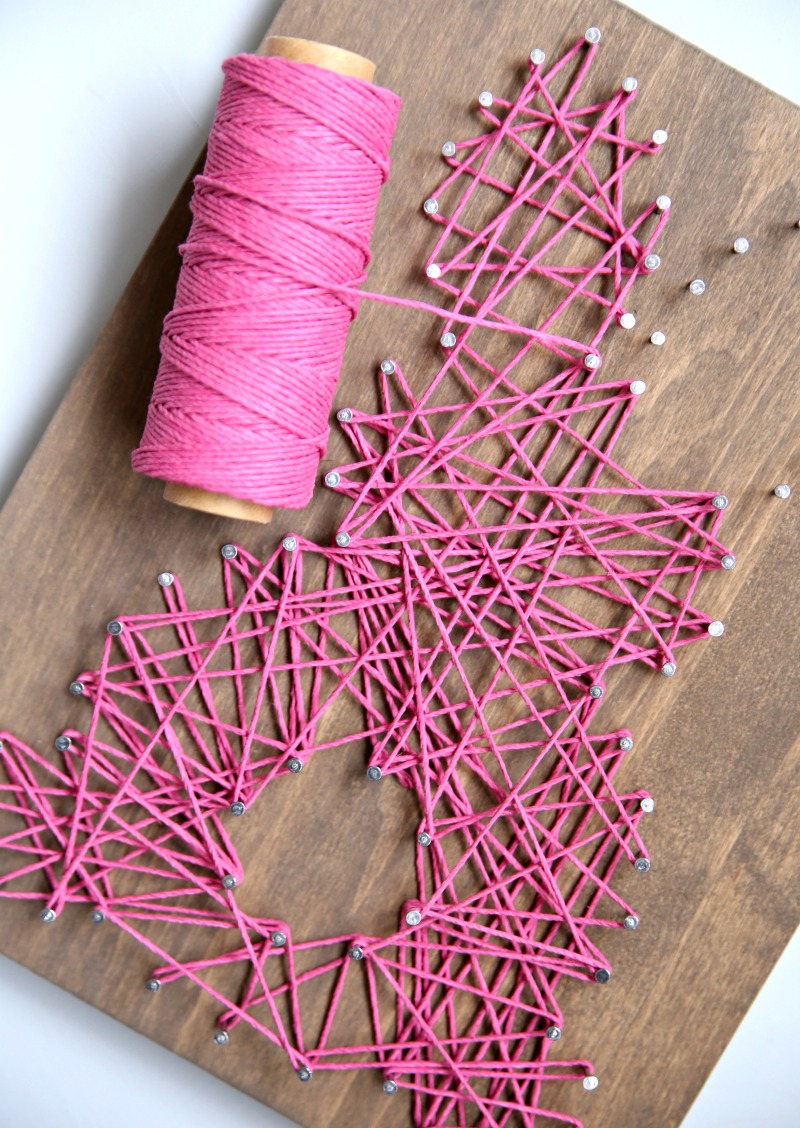
Remove the paper template. Tie the string to one nail and just start wrapping the string around the nails. There is no right or wrong way to do this. Just keep wrapping the strings so they overlap each other and have fun!
After my bunny was filled in I wrapped the string around each nail around the out edge of the bunny and tied the string in a knot to finish it off. I also used white string to define the bunny’s tail.
So what do you think? Not bad for my very first string art project.
I will admit that you can’t mess this up. As long as you space out your nails evenly, you’re string art will look amazing. I will also confess that I was so nervous about starting this project because I thought for sure it would look horrible but I LOVE it. This project shows you that if I can do it, you can do it!
Hi! The Bunny Template takes us to Michael’s – but I cannot find the template. Could you help?
Thank you!
Wow, it looks awesome, maybe I will try to make it and I will eat this snack when I watch the movie. Thanks for the recipe! foodle
I gained so much after seeing your post! In the past I often played games, this is a fun game for entertainment, but now I will follow you, reading your article will give me more knowledge.