Create Invitations with the Cricut Explore Air 2
This post and its photos may contain affiliate links. As an Amazon associate I earn from qualifying purchases. If you make a purchase through these links, I may receive a small commission at no extra cost to you.
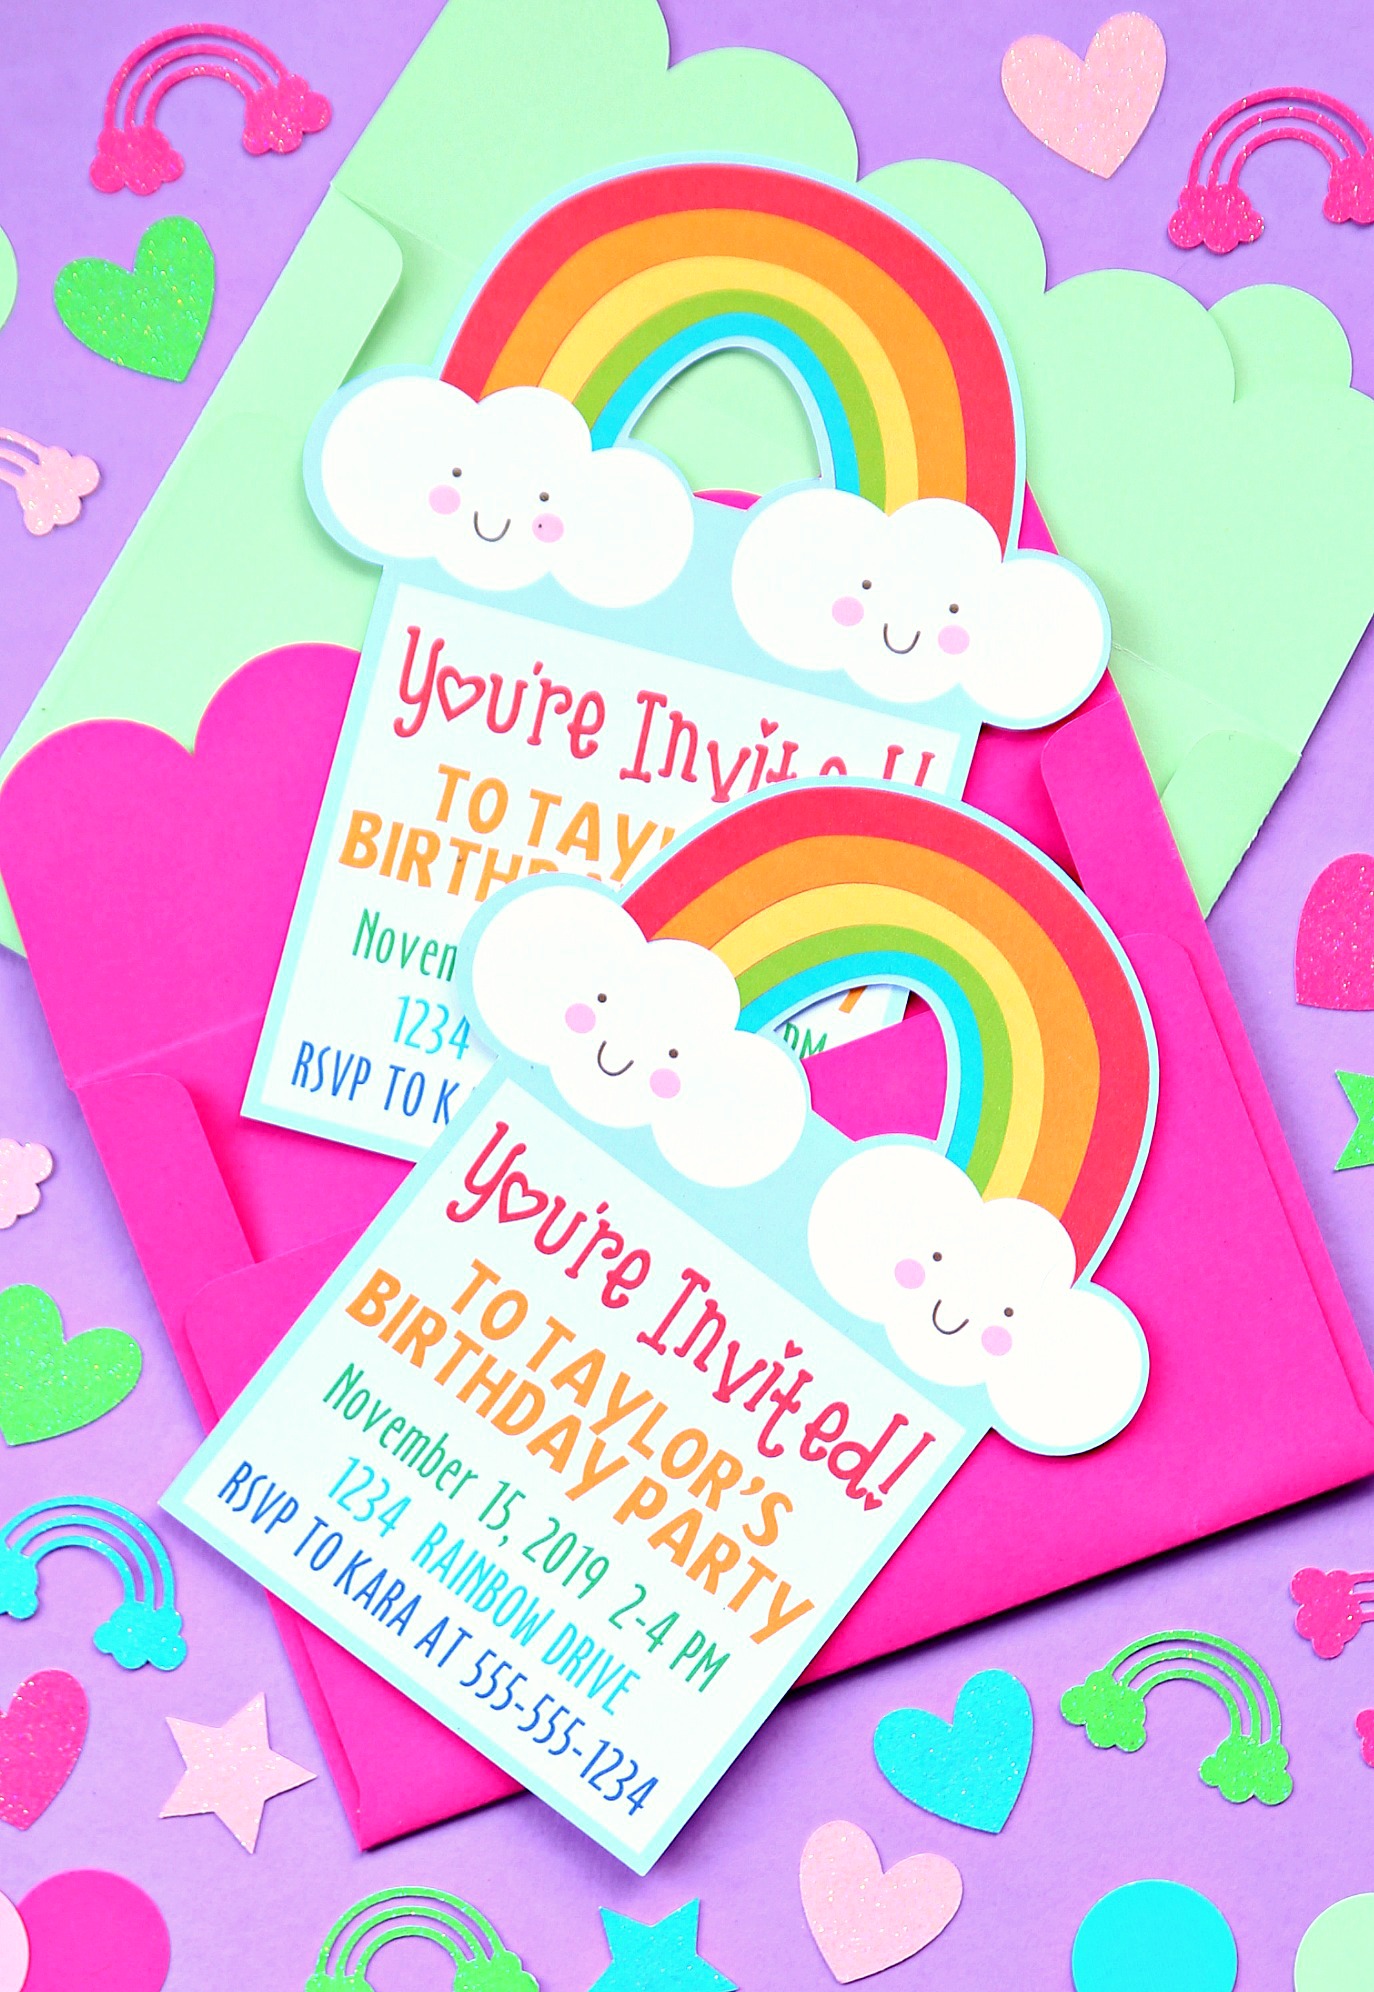
Learn to create custom invitations using your Cricut Explore Air 2 and the Print then Cut Feature with this fun tutorial.
It’s no secret that I love my Cricut Explore Air 2 and I LOVE finding new ways to use this awesome crafting tool.
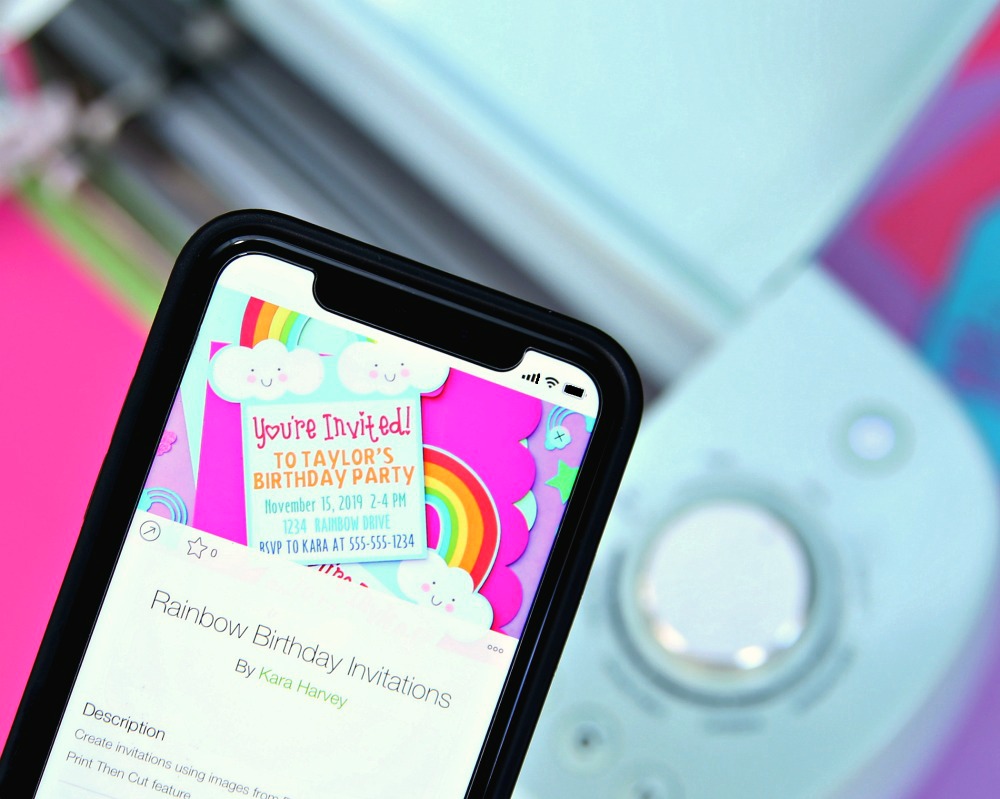
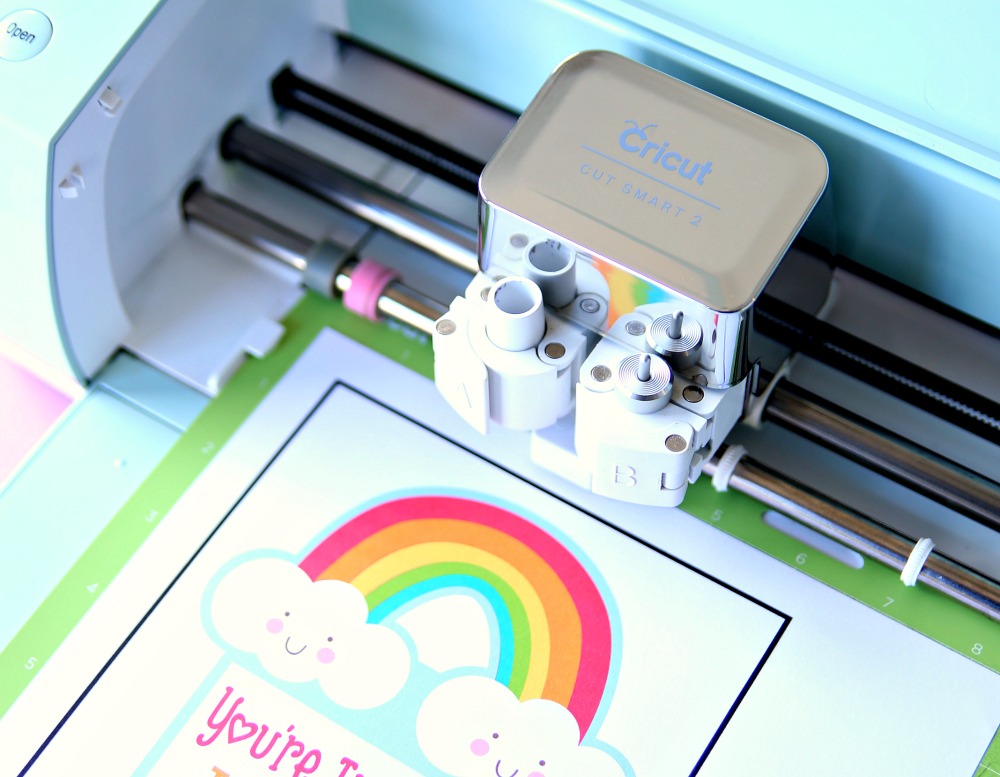
Did you know that you can create invitations using images in Cricut Design Space? Yep, and their Print Then Cut feature makes it even easier. You can show off your design skills while your handy dandy Cricut does all the cutting for you.
The best part about this project is you don’t have to be a designer because we’re using images in Cricut Design Space. All you have to do is insert images and add text. And, since Cricut Design Space is full of awesome designs, the possibilities are endless when it come to creating invitations.
Create Custom Invitations using the Cricut Explore Air 2
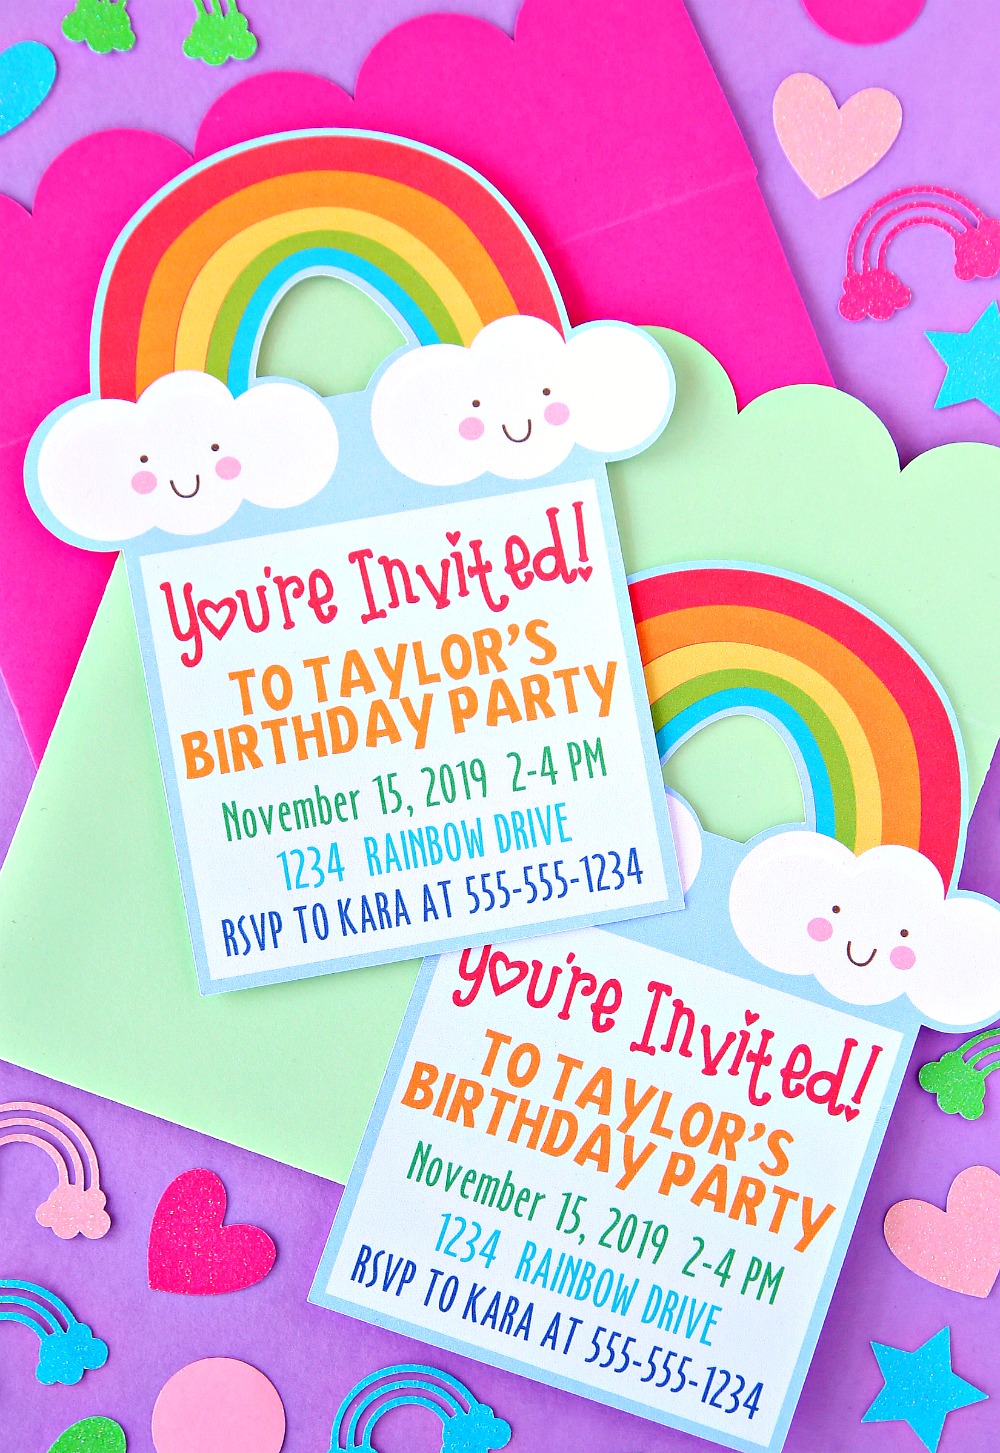
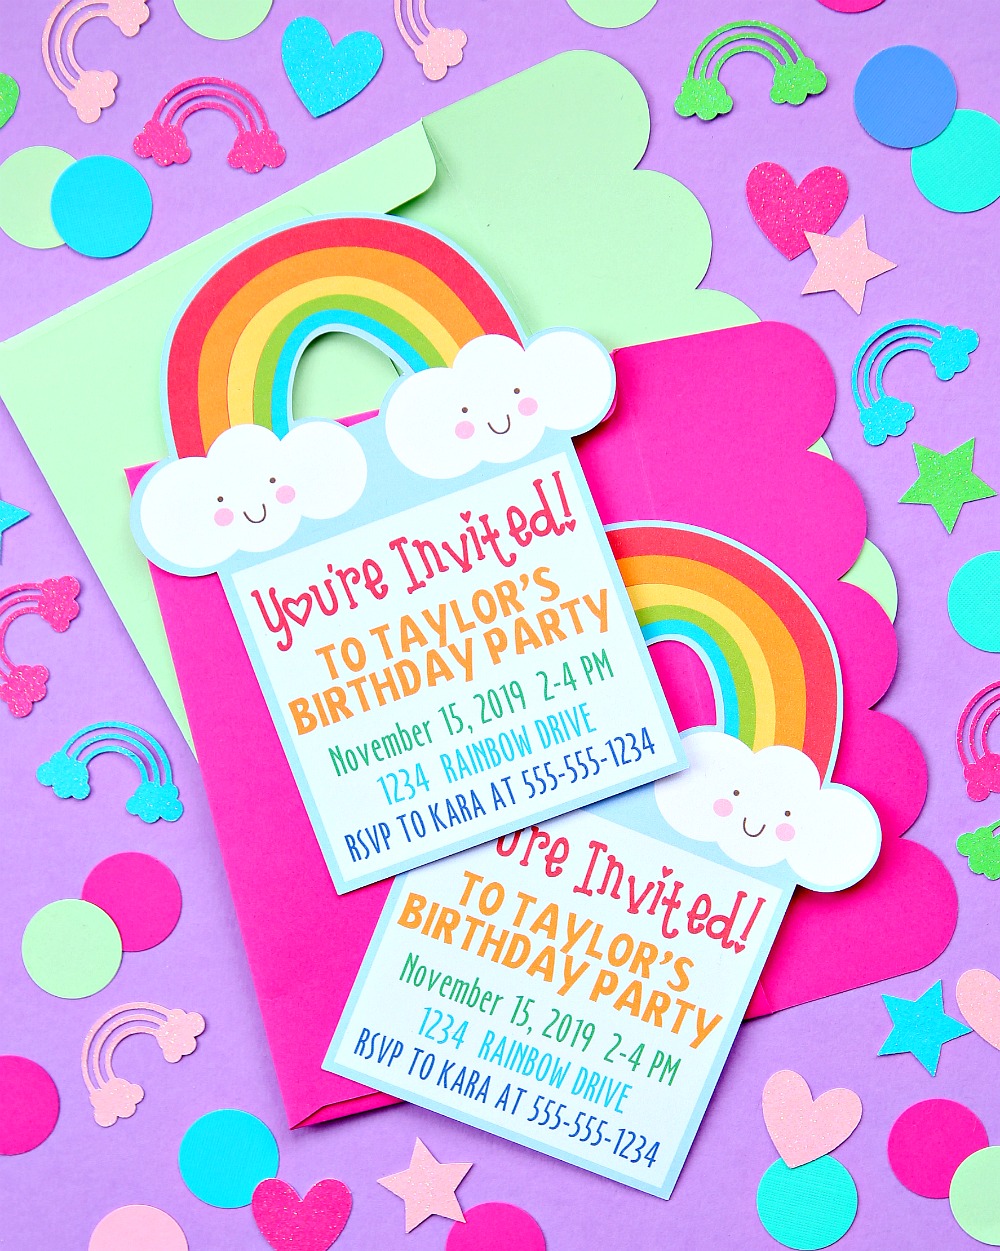
Today we’re going to be making these Rainbow Invitations. This project includes a rainbow image and two squares that are grouped together. That’s it! Then I just added the text and I was ready to print then cut my invitations.
Materials needed to Create Custom Invitations
- Cricut Design Space
- Cricut Explore Air 2
- Cricut Access for designs and fonts
- StandardGrip Cutting Mat
- White Cardstock
- Printer
How to Create Invitations
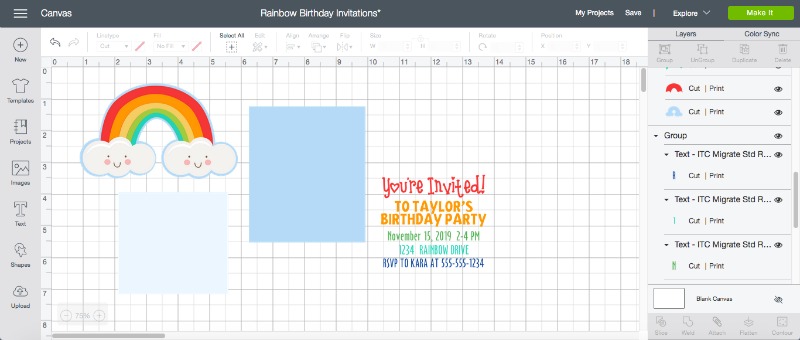
First we need to design our invitations in Design Space. Insert rainbow image or any image you want to use. Add a shape big enough for text. Then, add the text with information about the party. Cricut fonts used in this project include: DJ Flirt, Jacoby Black, and ITC Migrate STD Regular. I layered two rectangles and made one lighter so the text would show better. This is where you get to be creative. Add different shapes and images.
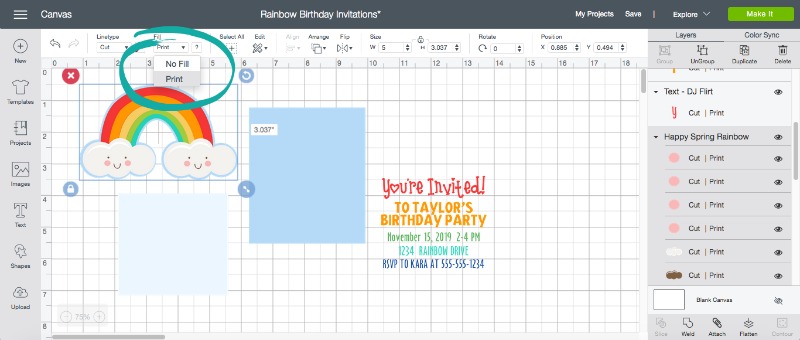
Once you have all your elements on your canvas, make sure everything is set to PRINT | CUT by selecting PRINT under FILL. Arrange your images and text so everything is centered and aligned. I like to group my elements as I line them up.
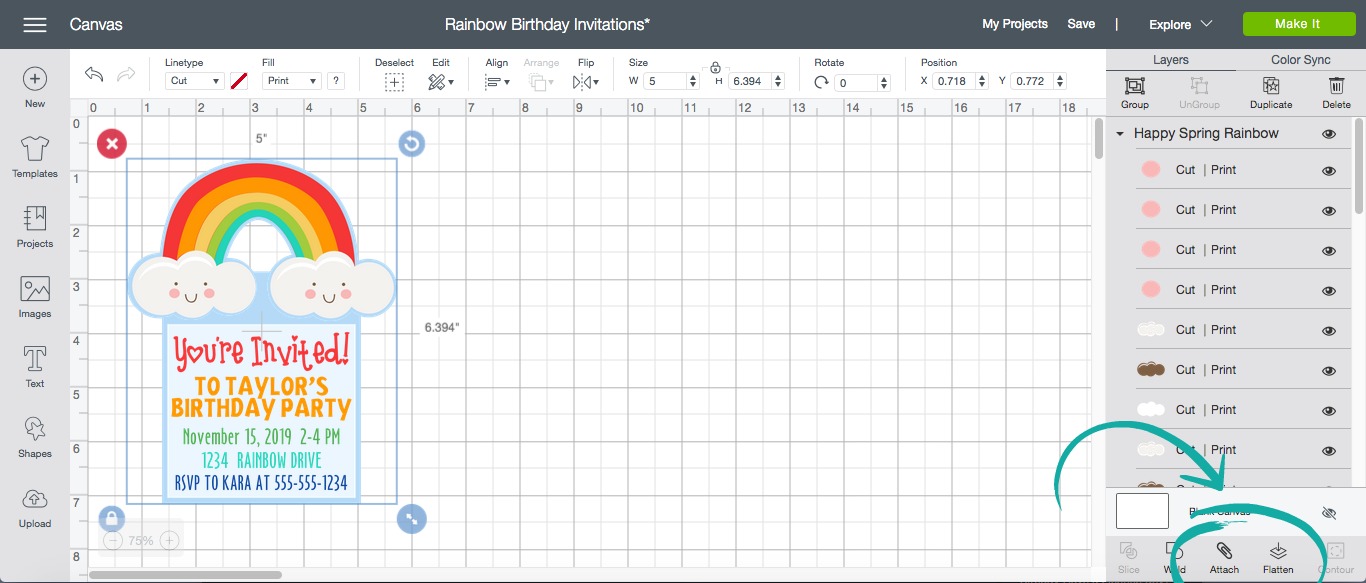
Next, click SELECT ALL and ATTACH, Then you have to click FLATTEN. This is the most important step so your Cricut knows to cut the outline of your entire image and not each image on your canvas.
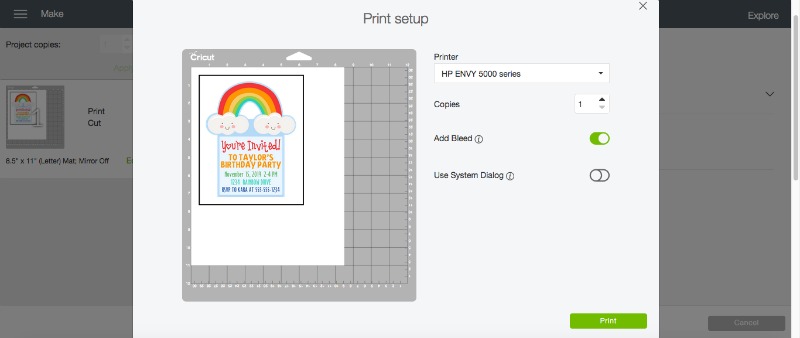
Now you are ready to click MAKE IT and send it to your printer.
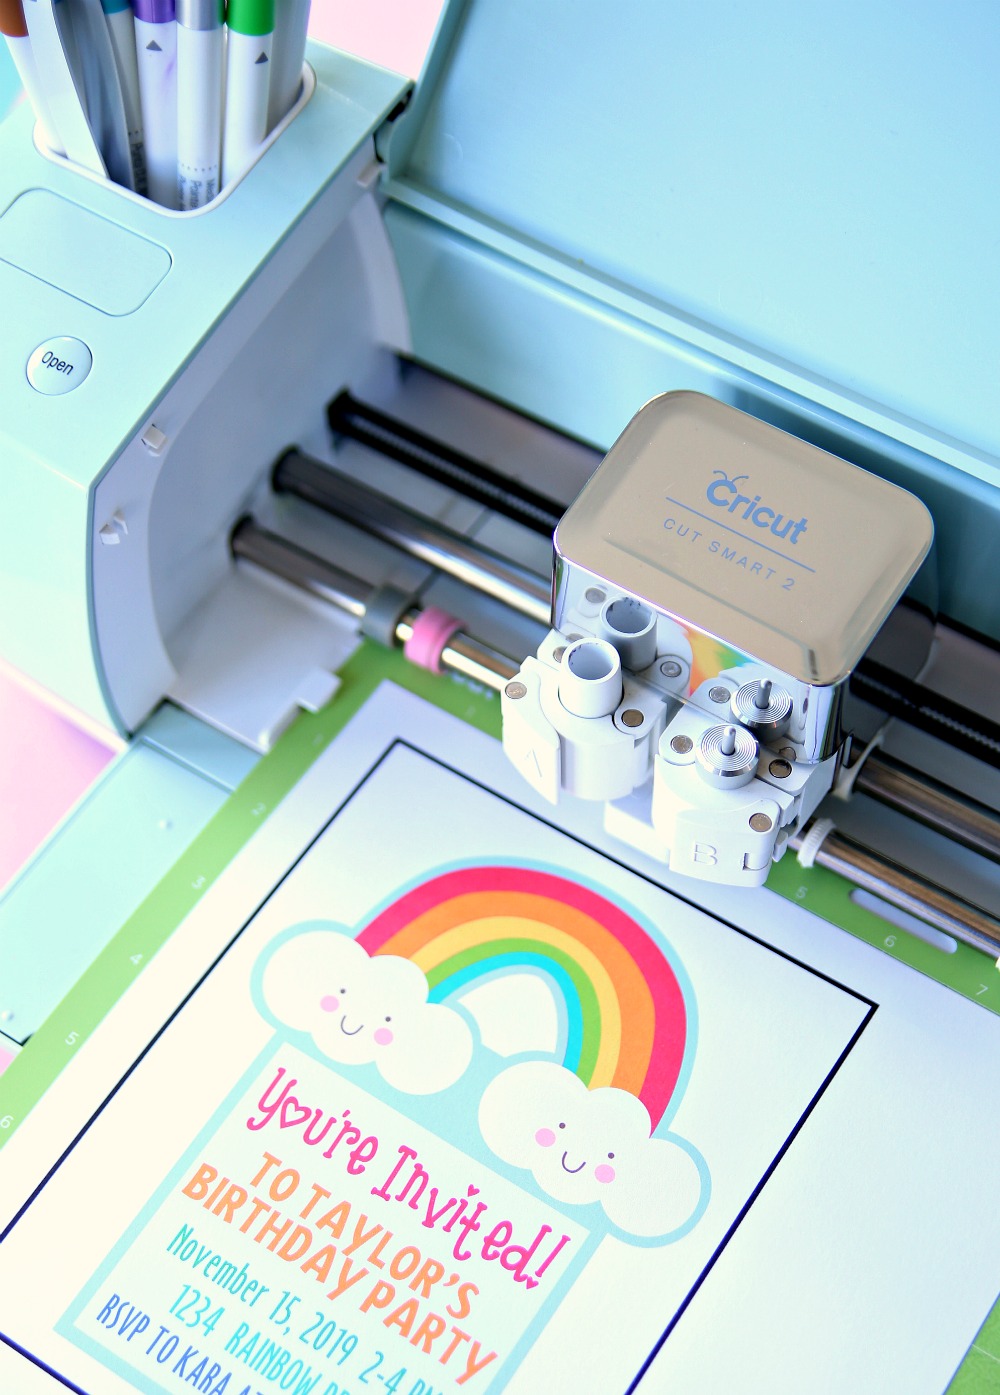
After your design prints, add the cardstock to the cutting mat and let your Cricut Work its magic.
This is just one invitation example. Feel free to use this design HERE and just edit the birthday party info or hae fun creating your own invitations in Design Space. The possibilities are endless. And, stay tuned because I will definitely be sharing more invitation designs.
Make Envelopes with the Cricut Explore Air 2
Of course we need envelopes for our invitations. These are so easy to make thanks to our Cricut and scoring stylus.
Materials needed for Envelopes
- Cardstock in a variety of colors
- Scoring Stylus (if you want to make envelopes)
- Envelope File in Cricut Access – #M2A33C1C
- StandardGrip Mat
- Glue dots
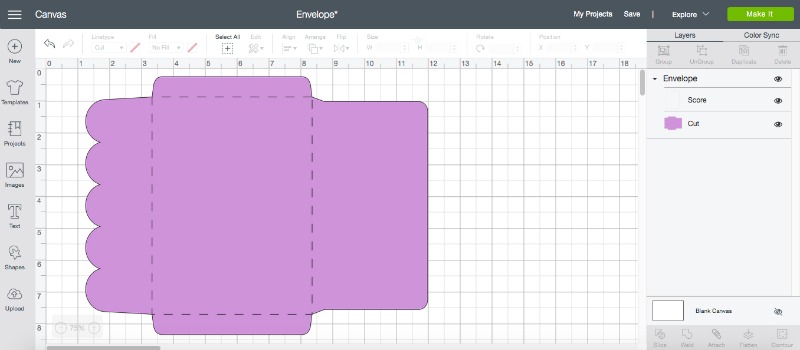
These envelopes couldn’t be any easier to make. Just add paper to cutting mat. Add scoring stylus to Cricut and click MAKE IT.
Now just let your fabulous Cricut do all the work for you. Then all you have to do is fold and glue the envelope together. 
5 Reasons Why I Love My Cricut Explore Air 2
My Cricut is definitely my favorite crafting tool for so many reason so I want to share the top 5 reasons why I love my Cricut Explore Air 2. I could really go on and on but we’ll stick with just 5 today:)
1. So Many Materials, So Many Possibilities
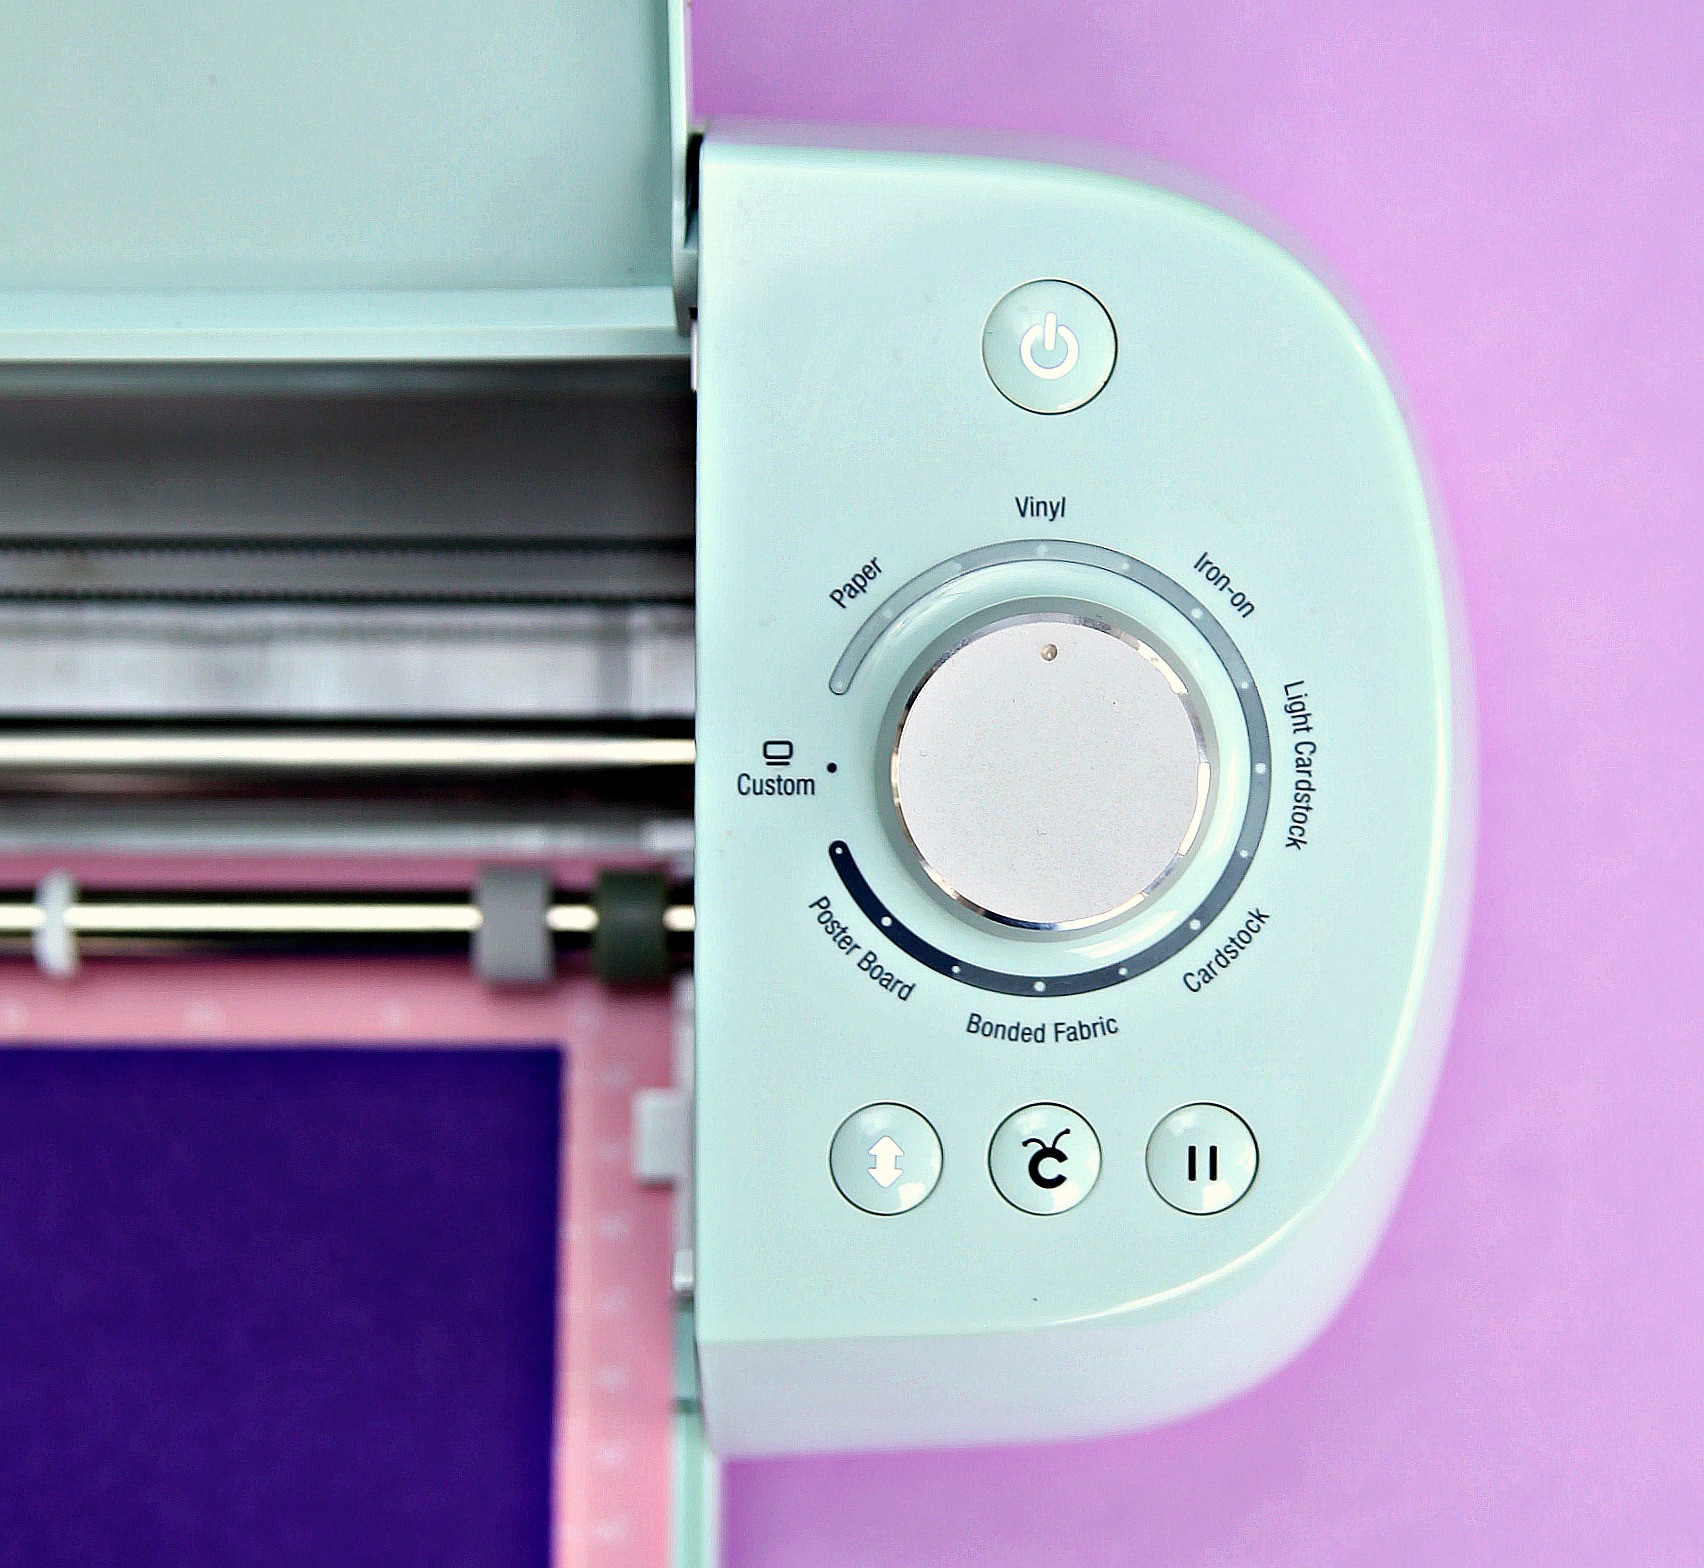
This bad boy can cut 100 different materials including paper, vinyl, and iron-on. But, did you know that it also cuts felt, fabric, glitter cardstock – even cork? I love using my Cricut Explore Air 2 to cut felt for birthday banners and I also used it recently to make gift tags with glitter cardstock. The craft projects are endless when you realize how many different materials this awesome tool can cut. And, the dial makes it so easy to choose the material you’re cutting especially when your project calls for different materials.
2. Cricut Design Space
Cricut Design Space includes over 75,000 designs and hundreds of Make it Now projects which means you will definitely find everything you need to make awesome projects with your Cricut Explore Air 2.
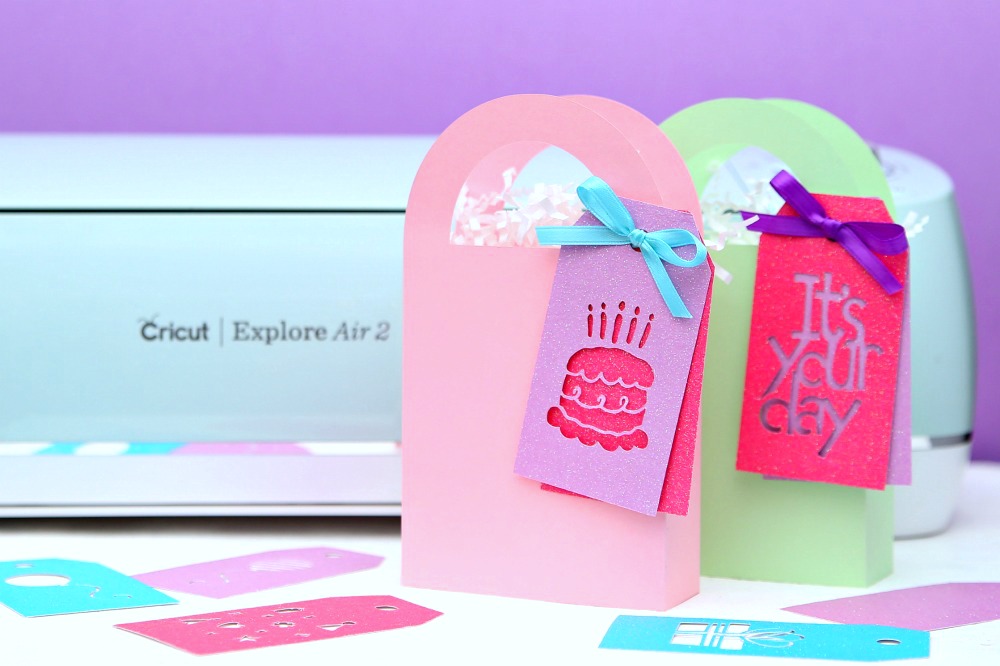
Since I’ve gotten my Cricut, I’ve made gift bags, gift boxes, gift tags, birthday cards, and so much more using images and projects from Design Space. Find the gift bag template HERE and the gift tags HERE.
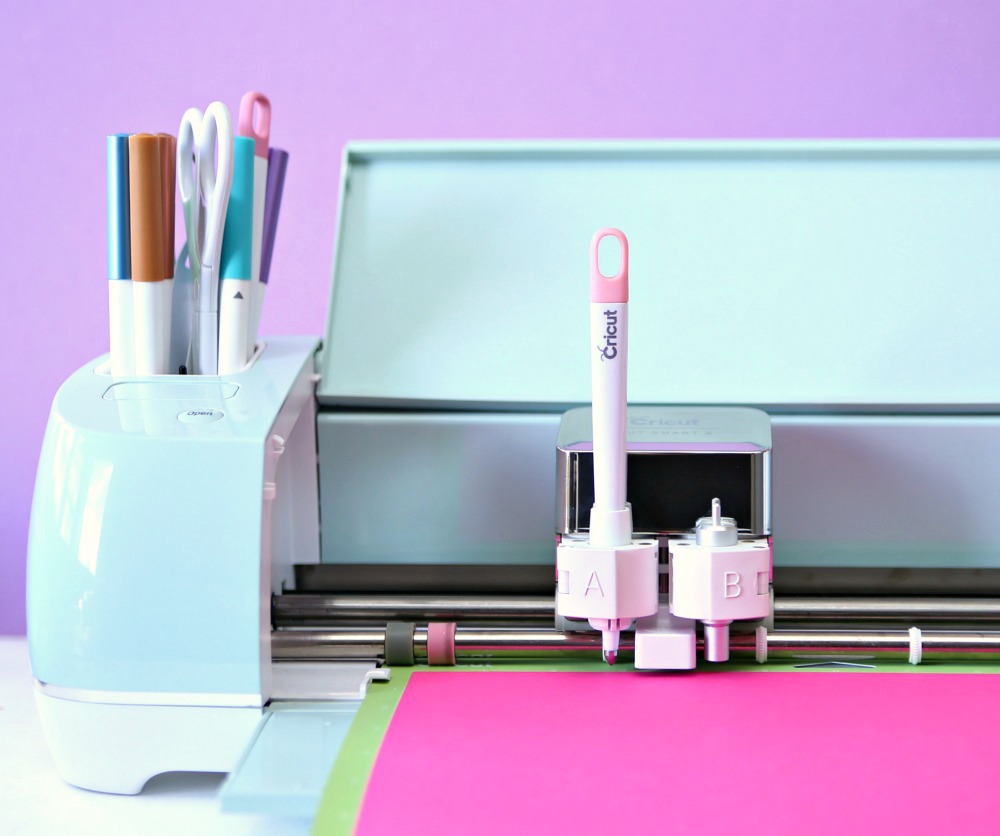
3. Writes and Scores
I LOVE LOVE LOVE that the Cricut Explore Air 2 writes and scores. I use the scoring feature all the time to make gift boxes and envelopes. I made these scalloped envelopes to go with the rainbow invitations.
The writing feature makes it so easy to create gift tags. I also used the Cricut pens to create these tic-tac-toe cards for Valentine’s Day.
4. Cricut App
If you aren’t using the Cricut App, you’re missing out! This app is so awesome and convenient. I can create new projects, add images from the Cricut Image Library or send the Make It Now™ projects right to my Cricut Explore Air 2 from my cell phone. It’s as easy as that! No cords needed because everything is Bluetooth.
5. Print Then Cut Feature
I just started using this feature for the first time a few months ago and I can’t believe I waited this long. The Print Then Cut Feature is truly amazing and I’m obsessed with finding new ways to use it. Make stickers, labels, invitations, and so much more with this awesome feature.
As you can see – there are so many reasons to love the Cricut Explore Air 2. And, I hope I’ve inspired you to create invitations using the Print Then Cut feature. If you make any invitations, please tag me on Instagram – @happy_go_lucky_blog so I can see your fabulous creations.
Hey, I saw I can download your templates for the rainbow invitations/envelopes. How do I do that? It keeps telling me invalid address.