DIY Hammered Heart Necklace
This post and its photos may contain affiliate links. As an Amazon associate I earn from qualifying purchases. If you make a purchase through these links, I may receive a small commission at no extra cost to you.
I have a fun and easy necklace project for you all today. This is my first attempt at hammered metal and I’m pretty pleased with how it turned out.
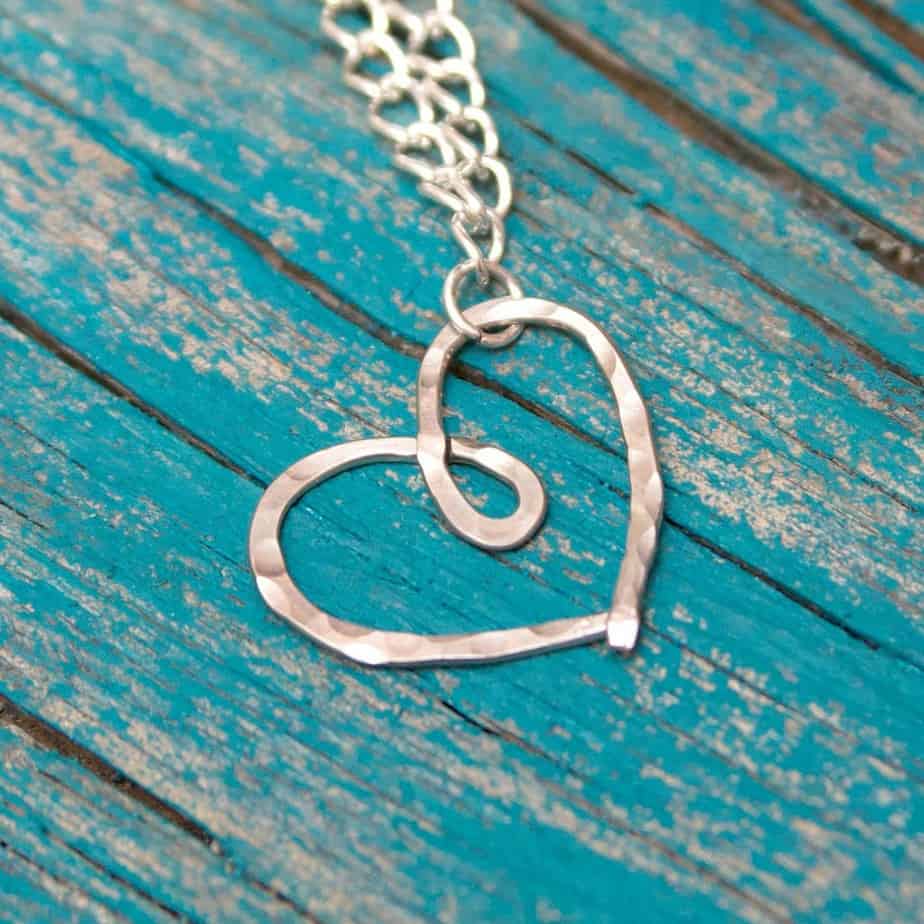
I’ve been wanting a simple heart necklace that I can wear all the time and I love the look of the open heart charms. All you need are a few supplies and you can make this simple hammered heart necklace. Even if you’ve never made jewelry before, you can make this necklace and you’ll probably end up making a few for your friends too!
Supplies needed:
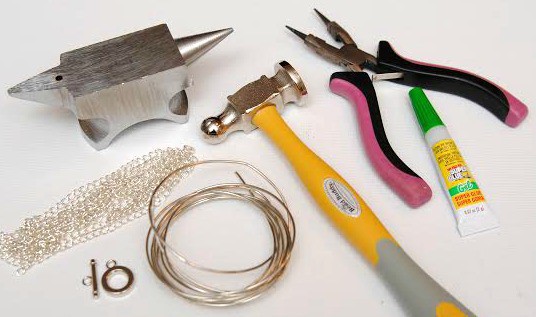
- 16 gauge wire
- Chasing Hammer
- Anvil Jewelers Tool
- Round Nose Pliers
- Chain
- Toggle or Clasp
- super glue
Step 1: Cut a 5-6 inch piece of wire. Form the wire into a shape of a heart. I twisted the wire at the bottom of the heart to I had something to hold onto.
Step 2: Place the wire heart on the anvil. Use the larger side of the hammer to flatten the metal. Then use the round side of the hammer to add more texture.
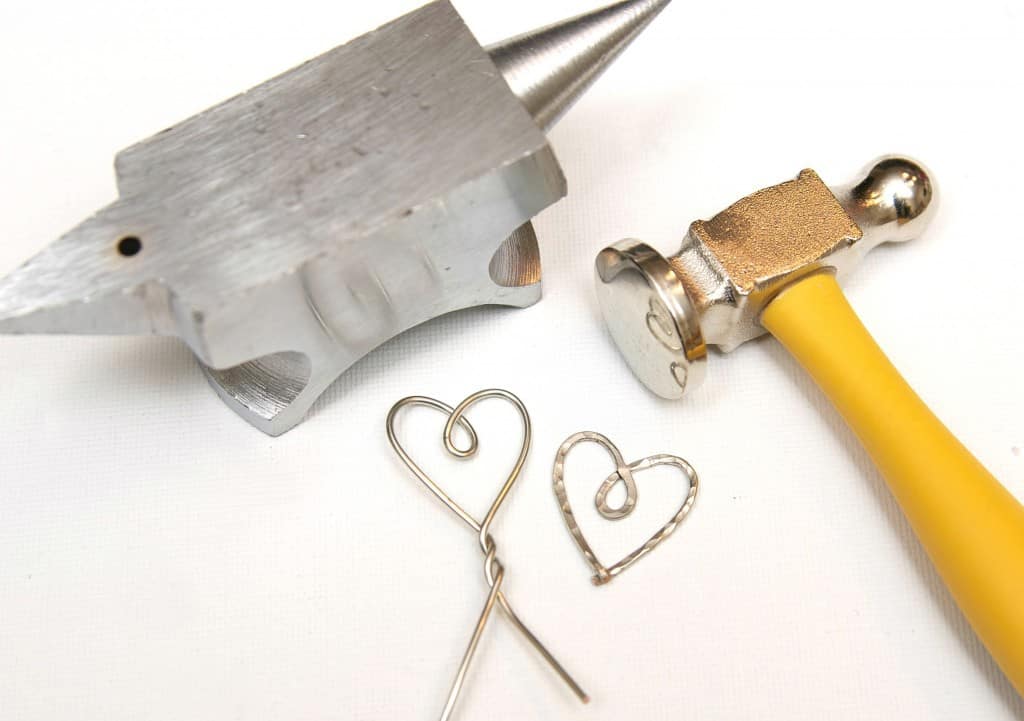
Step 3: Cut access wire off the bottom of the heart. At first I was going to keep some of the twisted wrie but I didn’t really like the way it looks so I trimmed it off. Glue bottom of heart end of heart together.
Step 4: Add toggle or clasp to end of chain.
Step 5: Add jump ring to heart then add to chain.
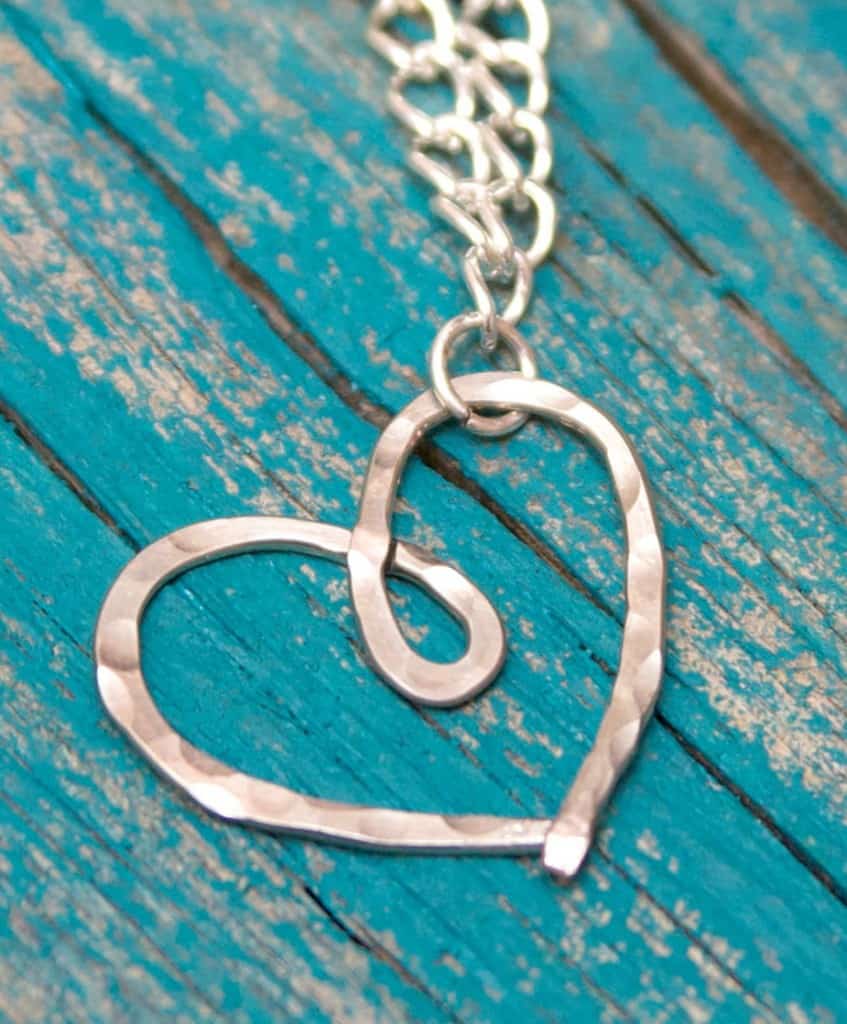
Now put your new necklace around your neck and admire it because that is the best part of making your own jewelry.
I hope I’ve inspired you to create your own hammered heart necklace. And once again – if I can do it, you can too! This was way easier to make than I thought it was going to be. It took me longer to take pictures of the necklace than it did to make it and I’ve made 3 more for a few of my friends.

Clever clever! It looks fabulous! Will definitely be giving this a go! I bet you could do circles and other shapes or even letters too! THanks for sharing!
This. is. GORGEOUS! Pinned it and will be trying it as soon as I can shovel out and get some 16 gauge wire!!!!
Love it!! So pretty. Thanks so much for the idea. Pinning 🙂
I love this! What a wonderful idea and soooo pretty! Pinned it! 😀
It looks so pretty! Great job!
This is sooooo pretty! I LOVE it!
What a beautiful necklace, Kara! I love it!
I love this! So cute. Hammering is so fun 🙂
Kara I absolutely LOVE this! Who knew making your own jewelry could be so easy and turn out so cute!
Kara! We are on the same wavelength – I JUST hammered my very first wire project last night! Question for you – what kind of wire are you using? I used silver plated copper wire, and my copper core shows at the ends. Wondering if there’s any way to avoid this? Is there a certain hammering technique I’m missing? Or do I need to bite the bullet and get the more expensive silver wire?
LOVE this, and it seems relatively easy to make! I think I’ll give it a try!
Love the style its Awesome
I know it says 16 gauge, but I am a beginner here, what kind of wire do you use and where would be a good place to get it?
Thank you for this. I’ve recently had to give up beaded jewellery as my osteo- arthritis is in my fingers and it’s making it difficult to use the fine needles but I’m going to give this a go. Thank you. It’s beautiful, you are gifted.
this is super cute and easy to make!
If you have questions or need something clarified, you need to be
able to call or send an email. Treat the pair with a spa treatment filled with body wrap, skin scrub.
” I saw a chapter of Seinfeld recently where Jerry’s friend, George, was upset because his co-workers developed a donation to your children’s charity in his name as Christmas gifts.