Fun & Easy Stenciled Pillow
This post and its photos may contain affiliate links. As an Amazon associate I earn from qualifying purchases. If you make a purchase through these links, I may receive a small commission at no extra cost to you.
I’m a little addicted to throw pillows lately. I can’t seem to never have too many fun pillows around the house!
And guess what? Tulip For Your Home has made stenciling super fun and easy. Create pillows, art work, curtains, napkins and so much more with their fabulous collection of stencils and paint supplies. There are so many stencil designs to choose from that you will want them all.
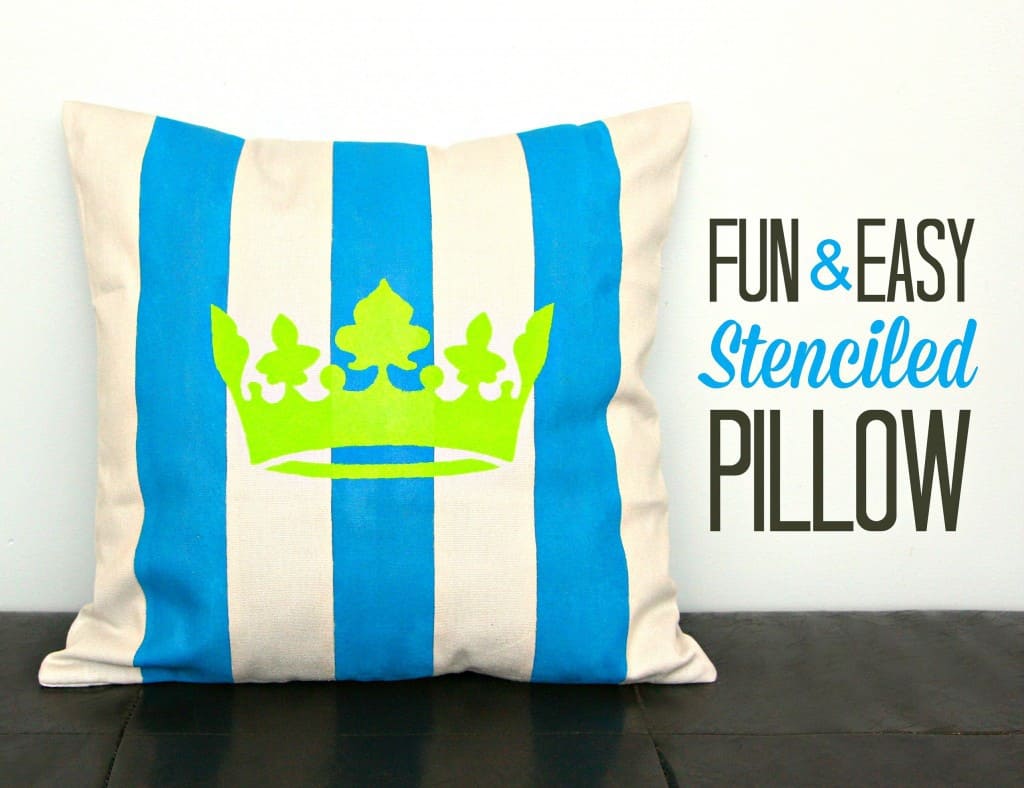
I received a box full of awesome stenciling supplies from I Love to Create and decided to make Connor a throw pillow for his playroom.
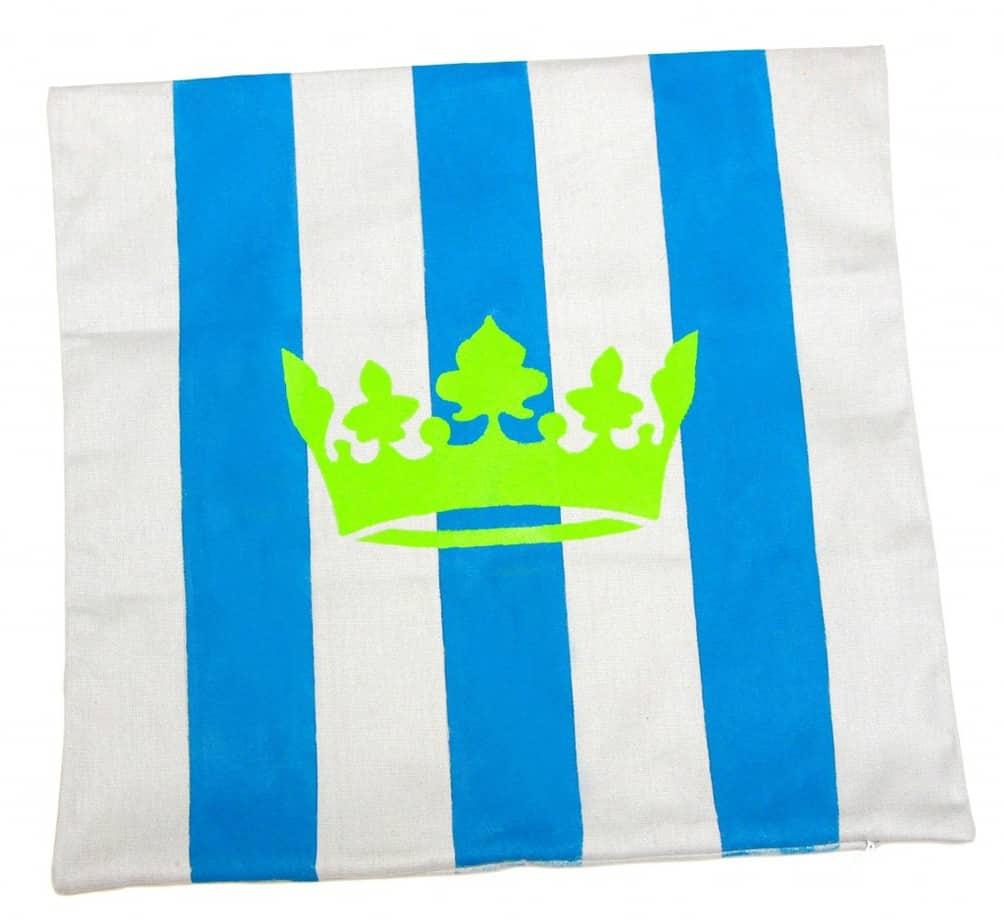
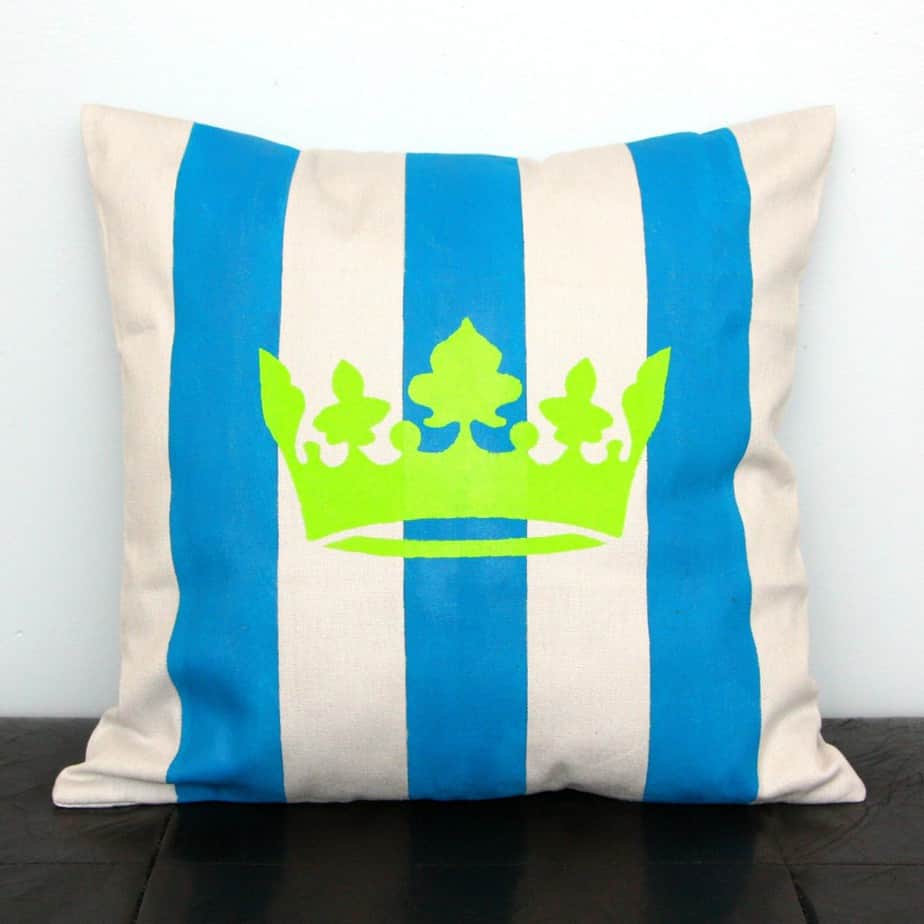
I used the crown and striped stencils along with the blue and green paint. The spray adhesive is amazing and the roller made the project so much easier. I love that I was able to make a gorgeous pillow in 5 easy steps.
Want to make one with me? I promise it’s easy and won’t take long at all.
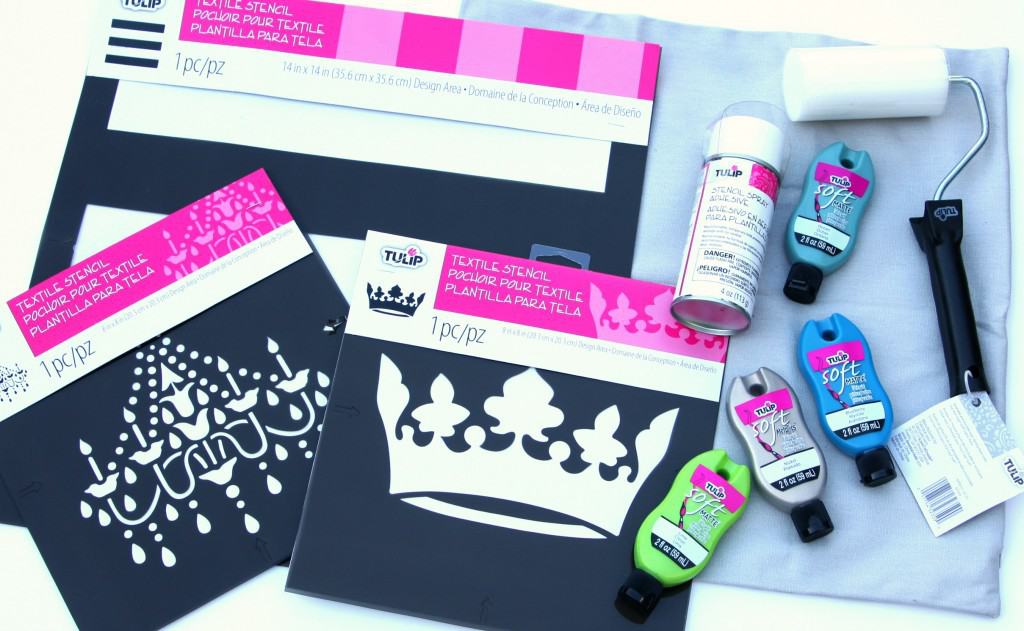
All you need are the following supplies:
- 14″ x 14″ striped stencil
- 8″ crown stencil
- stencil spray adhesive
- paint roller
- pillow cover
- Tulip Soft paint (your two favorite colors)
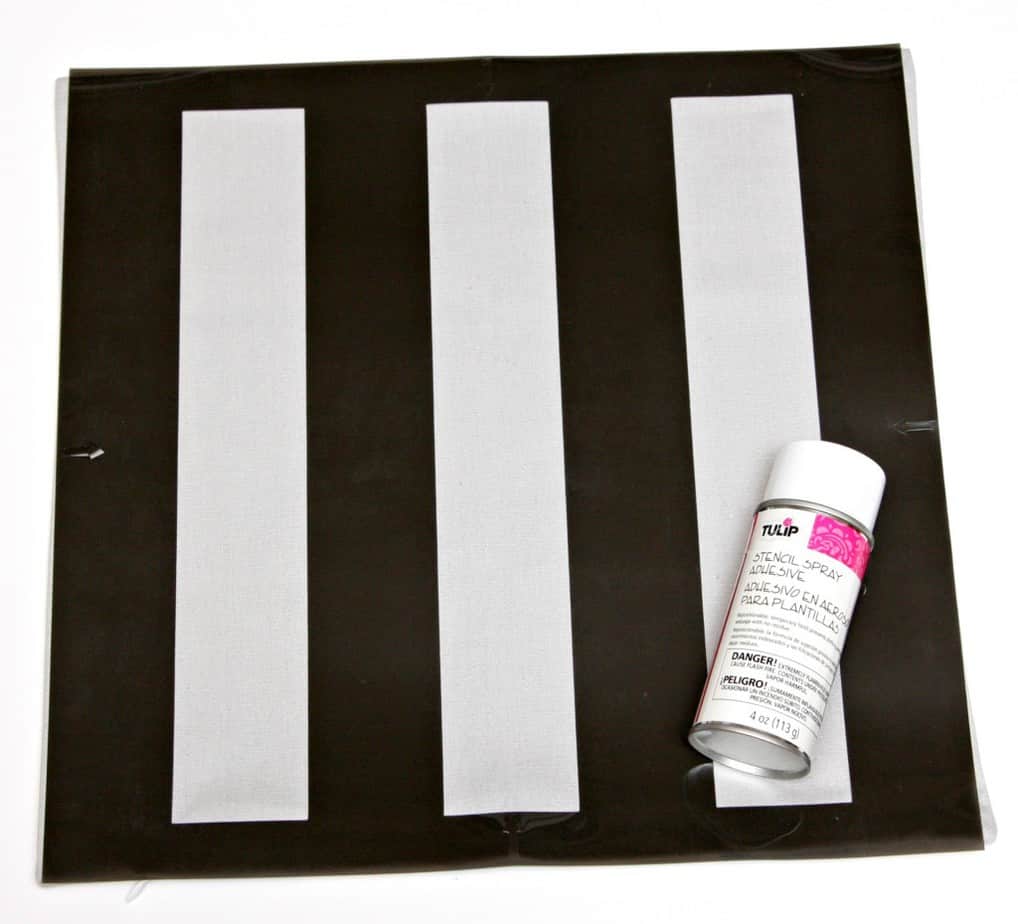
Step 1: Spray striped stencil with spray adhesive and press stencil in place.
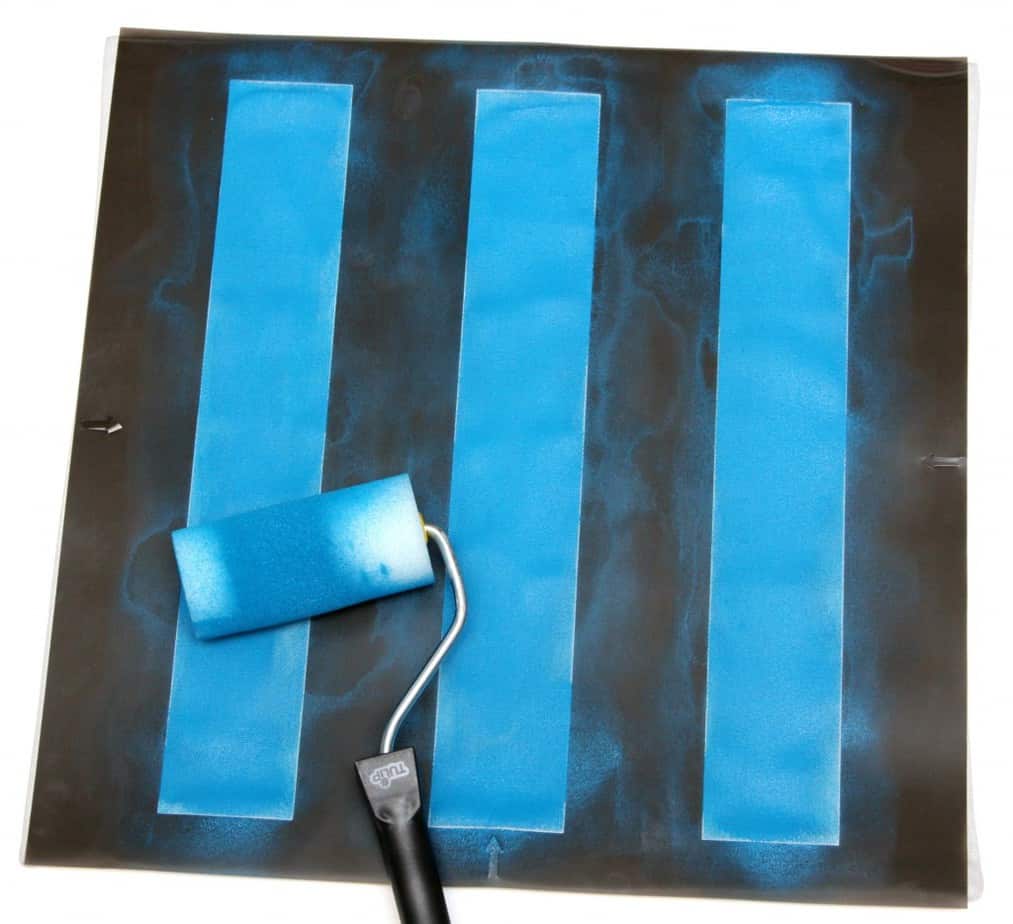
Step 2: Use the roller to apply paint. Remove stencil and let paint dry. I then repositioned the stencil so the stripes reached the edges of the pillow.
Step 3: Once the blue paint was completely dry, I was ready to add the second design. Spray the crown stencil with spray adhesive. Press stencil in place and paint.
Step 4: Remove and let paint dry.
Step 5: Insert pillow form and admire your fabulous new pillow.
How cute is this pillow? I love the color combination and that it was so easy to make.